custom cut tiles

SETTING A SAFER PRECEDENT FOR CANADA: YMCA OF GREATER MONCTON

Recently, NSF International expanded Standard 50 to extend across Canada, which includes recommendations for surfacing in aquatic play areas under NSF/ANSI/CAN 50:26 (formerly NSF/ANSI 50:26).

YMCA OF GREATER MONCTON

With its recent Life Floor installation, the YMCA of Greater Moncton, NB is one of the first aquatic facilities in Canada to recognize the importance of having NSF/ANSI/CAN 50:26 certified safety surfacing. The facility is a combination of an indoor splash pad with a zero-depth entry and a playground. Because of this unique configuration, the staff sought out a product that was able to transition seamlessly from wet to dry applications while maintaining their commitment to safety. To accomplish this, they selected Life Floor to be installed.

Having seen Life Floor at a major trade show, we knew it was the product we wanted to install in our new facility.
— Scott Munro, Vice President of Facilities
YMCA OF GREATER MONCTON

A custom beach-inspired design was chosen to complement the existing tropical theming. Life Floor’s foam-rubber tiles were able to create the perfect transition the YMCA needed between the wet and dry play areas, especially since splash pads are essentially wet playgrounds. The cushioned and impact-absorbing surfacing allows children to run, jump, and play without limits - never needing to stop and put on shoes or change the way they play from one area to the next. As a result, the fully immersive experience enhances imaginative play. 

The YMCA of Greater Moncton is skipping ahead of their competition by creating a facility full of imagination, play, and fun. They have created a holistic experience to provide their members with the perfect beach day right in their community’s backyard.

We thank the YMCA of Greater Moncton for their commitment to safety and for being one of the first in Canada to adopt NSF/ANSI/CAN 50:26 safety surfacing standards for the benefit of their members. We look forward to the future as more Canadian facilities follow their example and recognize the importance of this safety standard as an integral part of their business.


To learn more about the official code in your region or state, check out this free resource.


If you’d like to specify or install NSF/ANSI/CAN 50:26 surfacing for an aquatic play area in Canada, please contact our Canadian Partner, Paul-Émile Beaudry at pebeaudry@polyvalens.ca to assist you in both English and French.

For U.S. clients and all other inquiries, please contact us directly via our online contact form or send us an email at solutions@lifefloor.com

French Translation

Le YMCA du Grand Moncton, NB crée un précédent sécuritaire en milieu aquatique au Canada.

Récemment, NSF International a étendu la norme Standard 50 partout au Canada, incluant des recommandations pour les surfaces de jeu aquatiques sous l’appellation NSF/ANSI/CAN 50,26 (précédemment nommée NSF/ANSI 50:26).

Avec ses récentes installations de Life Floor, le YMCA du Grand Moncton, NB est l’un des premiers centres d’installation aquatique à reconnaître l’importance d’avoir une surface sécuritaire certifiée NSF/ANSI/CAN 50:26. En effet, l’établissement se compose d’un mix de  deux (2) aires de jeux, l’une étant une surface mouillée (indoor splash pad) plane et l’autre étant une aire de jeux sèche. À cause de cette configuration spéciale, les employés ont recherché un produit qui permettrait la transition en toute transparence, de la surface mouillée à la surface sèche pour leurs activités tout en gardant un engagement de sécurité irréprochable. Un seul choix leur permettait de tout rallier : Life Floor.

Après avoir vu Life Floor lors d'un grand salon, nous avons sû que c’était le produit que nous voulions pour nos installations !  —Scott Munro, Vice Président du YMCA du Grand Moncton, NB

Au niveau du design,  le thème tropical dans l’aire de jeu d’eau et le thème plage dans l’aire de jeu sèche sont en parfaite harmonie pour s’adapter au thème pré-existant. Et maintenant, les enfants peuvent donc courir, sauter, culbuter et jouer sans limites sur une surface conforme aux nouveaux standards. Les surfaces coussinées  et absorbant tout impact permettent aux enfants de jouer sans s’arrêter pour mettre leurs chaussures ou changer leur façon de jouer d’un endroit à l’autre. Comme résultat, l’expérience devient totalement immersive et renforce leur jeu imaginatif.

Le YMCA du Grand Moncton devient donc un chef de file en adoptant des installations pleines d’imagination, de jeu et de plaisir ! Ils ont créé une expérience holistique en offrant à leurs membres une journée de plage parfaite en plein dans leur cour !

Nous remercions le YMCA du Grand Moncton de leur engagement pour la sécurité de leurs membres et d’être les premiers au Canada à appliquer la norme NSF/ANSI/CAN 50.26. Nous espérons que plusieurs autres organismes, centres aquatiques  et municipalités suivront l’exemple du YMCA et reconnaîtront l’importance de l’application de cette recommandation comme faisant partie de leur politique d’opération .

Si vous désirez de plus amples informations sur les tuiles Life Floor, communiquez avec Polyvalens Inc, notre distributeur au Canada.
Vibrantly Themed Splash Pads Featured at Perfect Day® at CocoCay®

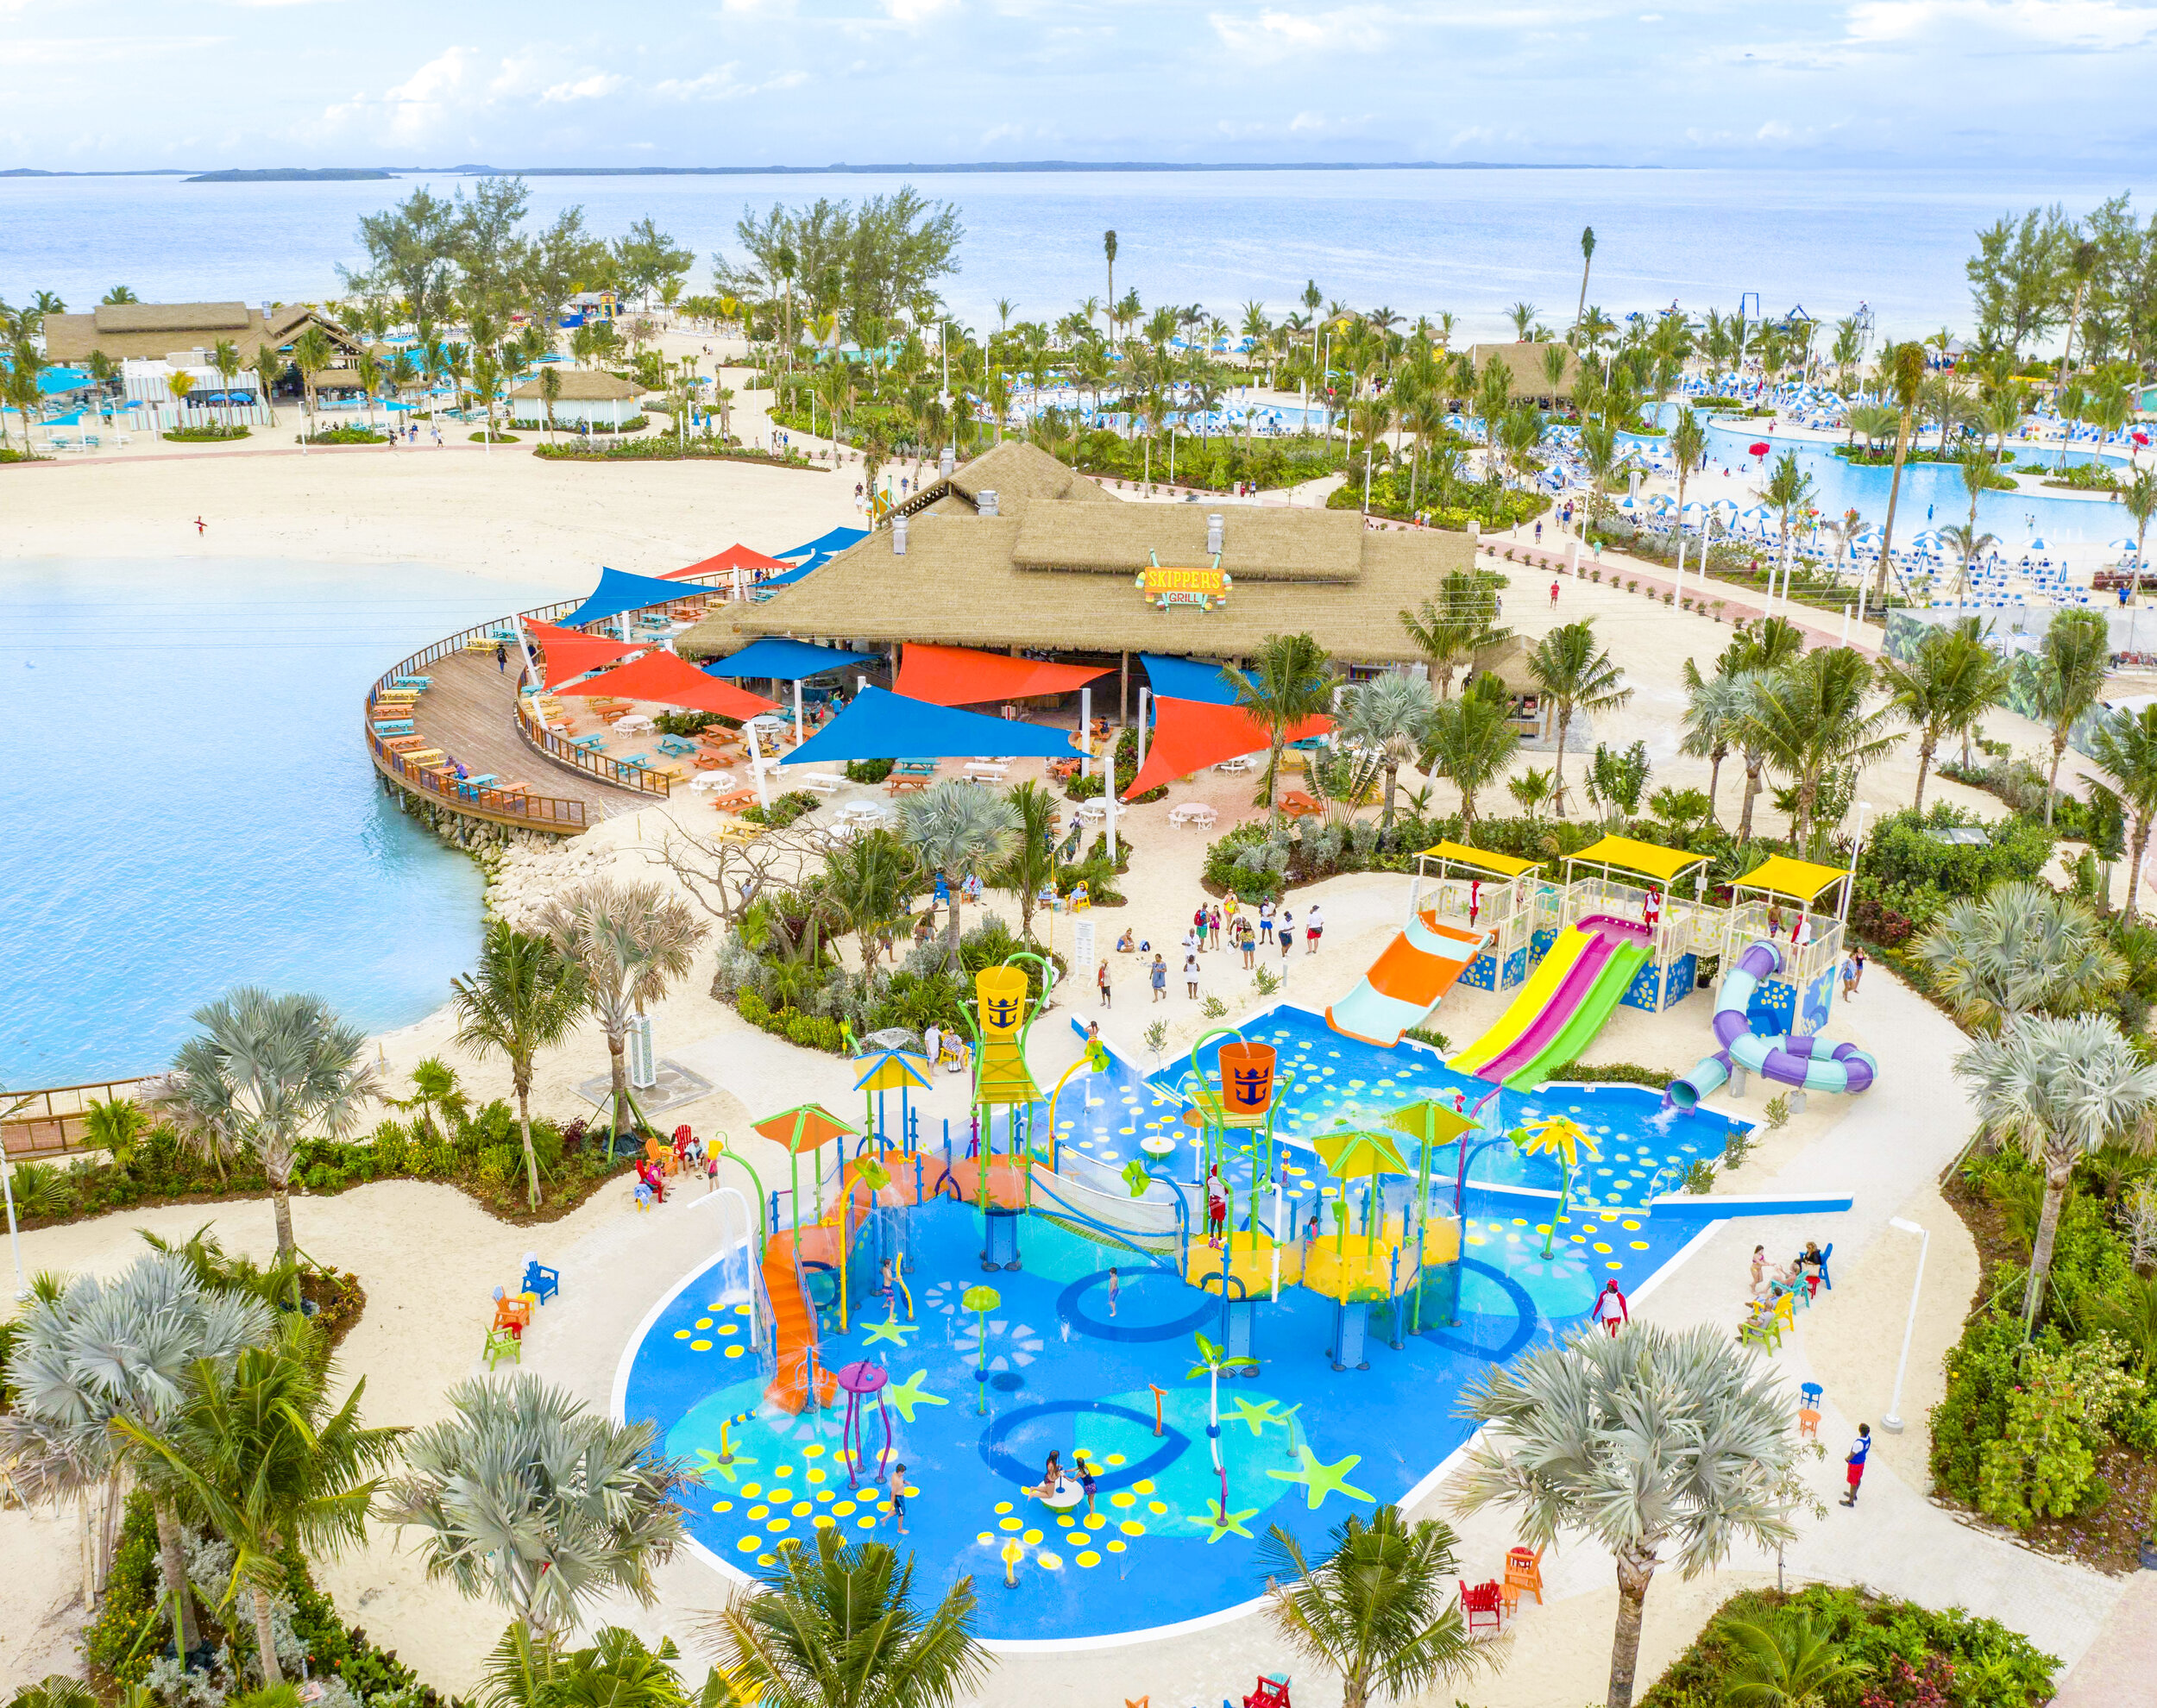
We’re proud to be featured at two beautiful splash pads that can be enjoyed whenever passengers spend a Perfect Day® at CocoCay® courtesy of Royal Caribbean. Guests can cool off, run and play, or relax on the sidelines at both Splashaway Bay designed by Martin Aquatic Design & Engineering or at Captain Jill’s Galleon designed by the Life Floor Studio. These two projects at CocoCay are quintessential examples of Life Floor’s custom cutting technology and our ability to match any aquatic feature’s theming. 

Splashaway Bay has a vibrant and whimsical underwater theme with bright inlays and shapes that match the graphic design of the play structure panels on the splash pad. This engaging design enhances play value by inspiring kids and families to create a variety of games hopping from color to color and shape to shape. The pairing of the surface design with this splash pad’s play structures and water features has easily made Splashaway Bay one of many focal points on the island. As a result, it has received recognition across the aquatics industry, including being named a 2019 AI Dream Design.

Perfect Day® at CocoCay®

Image Credit: Royal Caribbean

At Captain Jill’s Galleon, Life Floor surrounds a pirate vessel in a wavy pattern designed to mimic the water and shore beneath the massive hull. Sandy “islands” feature water cannons for water play at the surface level. As children venture down porthole slides and engage with the splash features, they can easily imagine sailing the high seas with the vast expanse of the ocean surrounding the island on the horizon.

Perfect Day® at CocoCay®

Image Credit: Royal Caribbean

Thank you to Royal Caribbean, Martin Aquatic Design & Engineering, WhiteWater West, and Inside Edge for collaborating with us to make the splash pads at this dream getaway a reality!

Creating Custom Shapes, Logos, and Designs with Life Floor Tiles

Creating Custom Shapes, Logos, and Designs with Life Floor Tiles

Splashaway Bay at CocoCay. Photo credit: Royal Caribbean

Did you know that despite being manufactured primarily as geometric tiles, Life Floor can be custom cut into any shape imaginable? From curvy designs to themed imagery and from games to giant logos, we’ve done it! Read more to learn about some of these popular design options that stray from our standard offerings to offer a more customized experience. 

Creating Custom Shapes, Logos, and Designs with Life Floor Tiles

For theming opportunities, we’ve cut anything from life-sized surfboards to giant paw prints and sandy islands into our floors. 

Captain Jill’s Galleon at CocoCay. Photo credit: Royal Caribbean

Captain Jill’s Galleon at CocoCay.
Photo credit: Royal Caribbean

ULTIQA Beach Haven Resort, Australia

Beach Haven, Australia

Curvy or circular designs are a popular choice for customers looking for a more organic look. 

Creating Custom Shapes, Logos, and Designs with Life Floor Tiles

For added play value at the surface level, we’ve created games to add to the guest experience for our customers as well. 

Creating Custom Shapes, Logos, and Designs with Life Floor Tiles

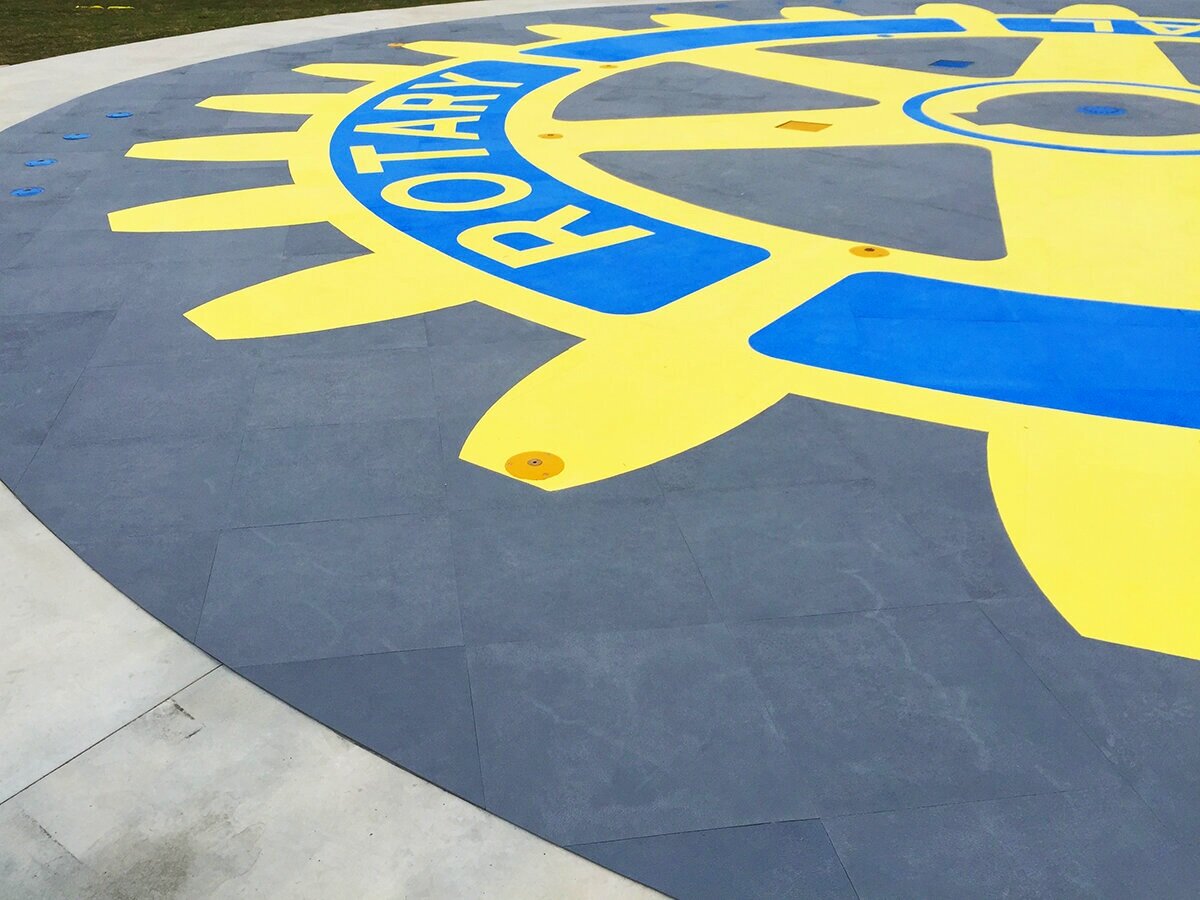
One of our most popular requests is to add elements of branding to surfaces - from giant logos to inlays that represent the facilities where they’re installed. 

As you can see, the opportunities and options are truly endless!


So how do we do it? 

The process varies by project. In some cases, like in the instance of giant circles, organic shapes can be hand cut on site by a skilled installation team. Large swooping curves can often be achieved this way as well.

Creating Custom Shapes, Logos, and Designs with Life Floor Tiles
Westfield Diagram

In other cases, projects come factory cut with labeled parts and diagrams to streamline the install process on site and to ensure design accuracy. 


Why don’t all customers take this approach? 

Creating Custom Shapes, Logos, and Designs with Life Floor Tiles

These designs are all amazing and we love that we’re able to create them! Unfortunately, some of these examples are out of budget for some customers. When dealing with curvy or custom designs, more material is needed to account for the amount of scrap created when trimming our square tiles to create these shapes. Installation costs are a bit higher as well due to the attention to detail needed to get the designs installed properly. 


Is there a more budget-friendly way to custom cut designs? 

Of course! In some cases, customers have opted for a repeatable inlay that can be cut from a single tile to help brand or theme their space. A great example of this is the maple leaf inlay we created for the Maple Grove Community Center

Creating Custom Shapes, Logos, and Designs with Life Floor Tiles

In other cases, a custom design only covers a small portion of a project while the rest of the design sticks with some of our more budget-friendly design options like our preferred colors or standard tile shapes. At the Courtyard by Marriott Anaheim, a few custom inlays and activities were interspersed throughout our simple pattern of square tiles in our High Tide theme

Creating Custom Shapes, Logos, and Designs with Life Floor Tiles

Another great way to incorporate a curved design is to limit the amount of tiles that need to be trimmed into a custom shape. At the splash pad at the Australia Zoo, only the perimeter of the “pond” needed to be cut while all other tiles could be installed as full square pieces.

Creating Custom Shapes, Logos, and Designs with Life Floor Tiles

While these projects all take a little extra effort during the design, manufacturing, and installation processes, we always love the results! Have an idea in mind that you’d like to explore with our team? Reach out to us and we’ll do our best to make it a reality!

Our Top 5 Life Floor Design Tips

While our Studio Team is happy to create design renderings for our clients, many customers and partnering designers have expressed interest in creating their own flooring designs. For anyone looking to get started with their own Life Floor projects, we’ve put together five of our top design tips to help guide the process! 


Include Three or More Colors in Designs 

We’ve found that designs containing three or more colors look best after installation. As an added benefit, they minimize visibility of debris or regular wear over time. This concept is similar to how complex carpet designs are applied in high traffic areas like casinos. An intricate or varied pattern will hide most imperfections. In contrast, any debris or marking on a solid field of color will be very apparent. We know it’s impossible to keep pool decks and splash pads absolutely spotless all day so this technique helps aquatic facilities continue to look their best. Multi-color designs also enhance spaces where they’re installed by creating vibrant and interesting patterns at the surface level. These designs are vast improvements to drab fields of grey concrete! They lend themselves to great theming opportunities as well.


Design within Project Budgets

While the sky's the limit for some customers, most are looking to stick within a specific budget. With a wide range of design and pricing needs in mind, we’ve created a variety of shape and color options to accommodate an array of project types.  

Our tiles are available in four shapes - squares, triangles, rectangles, and hexagons. Our square tiles are the most cost-effective option both in terms of material and installation costs. Triangles and rectangles have very similar material costs (since they’re just half squares). It’s important to note that they are slightly more expensive to install since more pieces are involved and the designs are typically a bit more complex. Of all of our shapes, hexagons are the most expensive.

Beyond these standard tile shapes, we can also custom cut our tiles into just about anything - curves, logos, games, images, you name it! These unique designs look great but use more material, require more factory preparation, and take more time to install so they’re generally the most expensive. 

Choosing an area as an accent piece can also enhance facilities within budget. This focal point can add visual interest to an entire project while also keeping the overall cost lower by using a simpler design throughout.

There are many ways to mix and match our tile shapes and colors to achieve a great project look. Hopefully these basics help inform some of the best opportunities to create some stellar designs that are also affordable at any price point!


Use a Staggered Grid for Tile Layouts

Staggered Grid

Standard (Checkerboard) Grid

While most people generally assume that our square tiles are best arranged in a standard (or checkerboard) grid, we actually recommend designing with our tiles on a staggered grid. We’ve found that this layout is ideal for ease of installation and maximum durability over time. Layouts that use standard grids are still a beautiful option; however, we generally recommend designing with them only for smaller applications or for designs that really rely on the checkerboard tile layout for a distinct pattern or look. 


Accent Designs with Theming and Play Options 

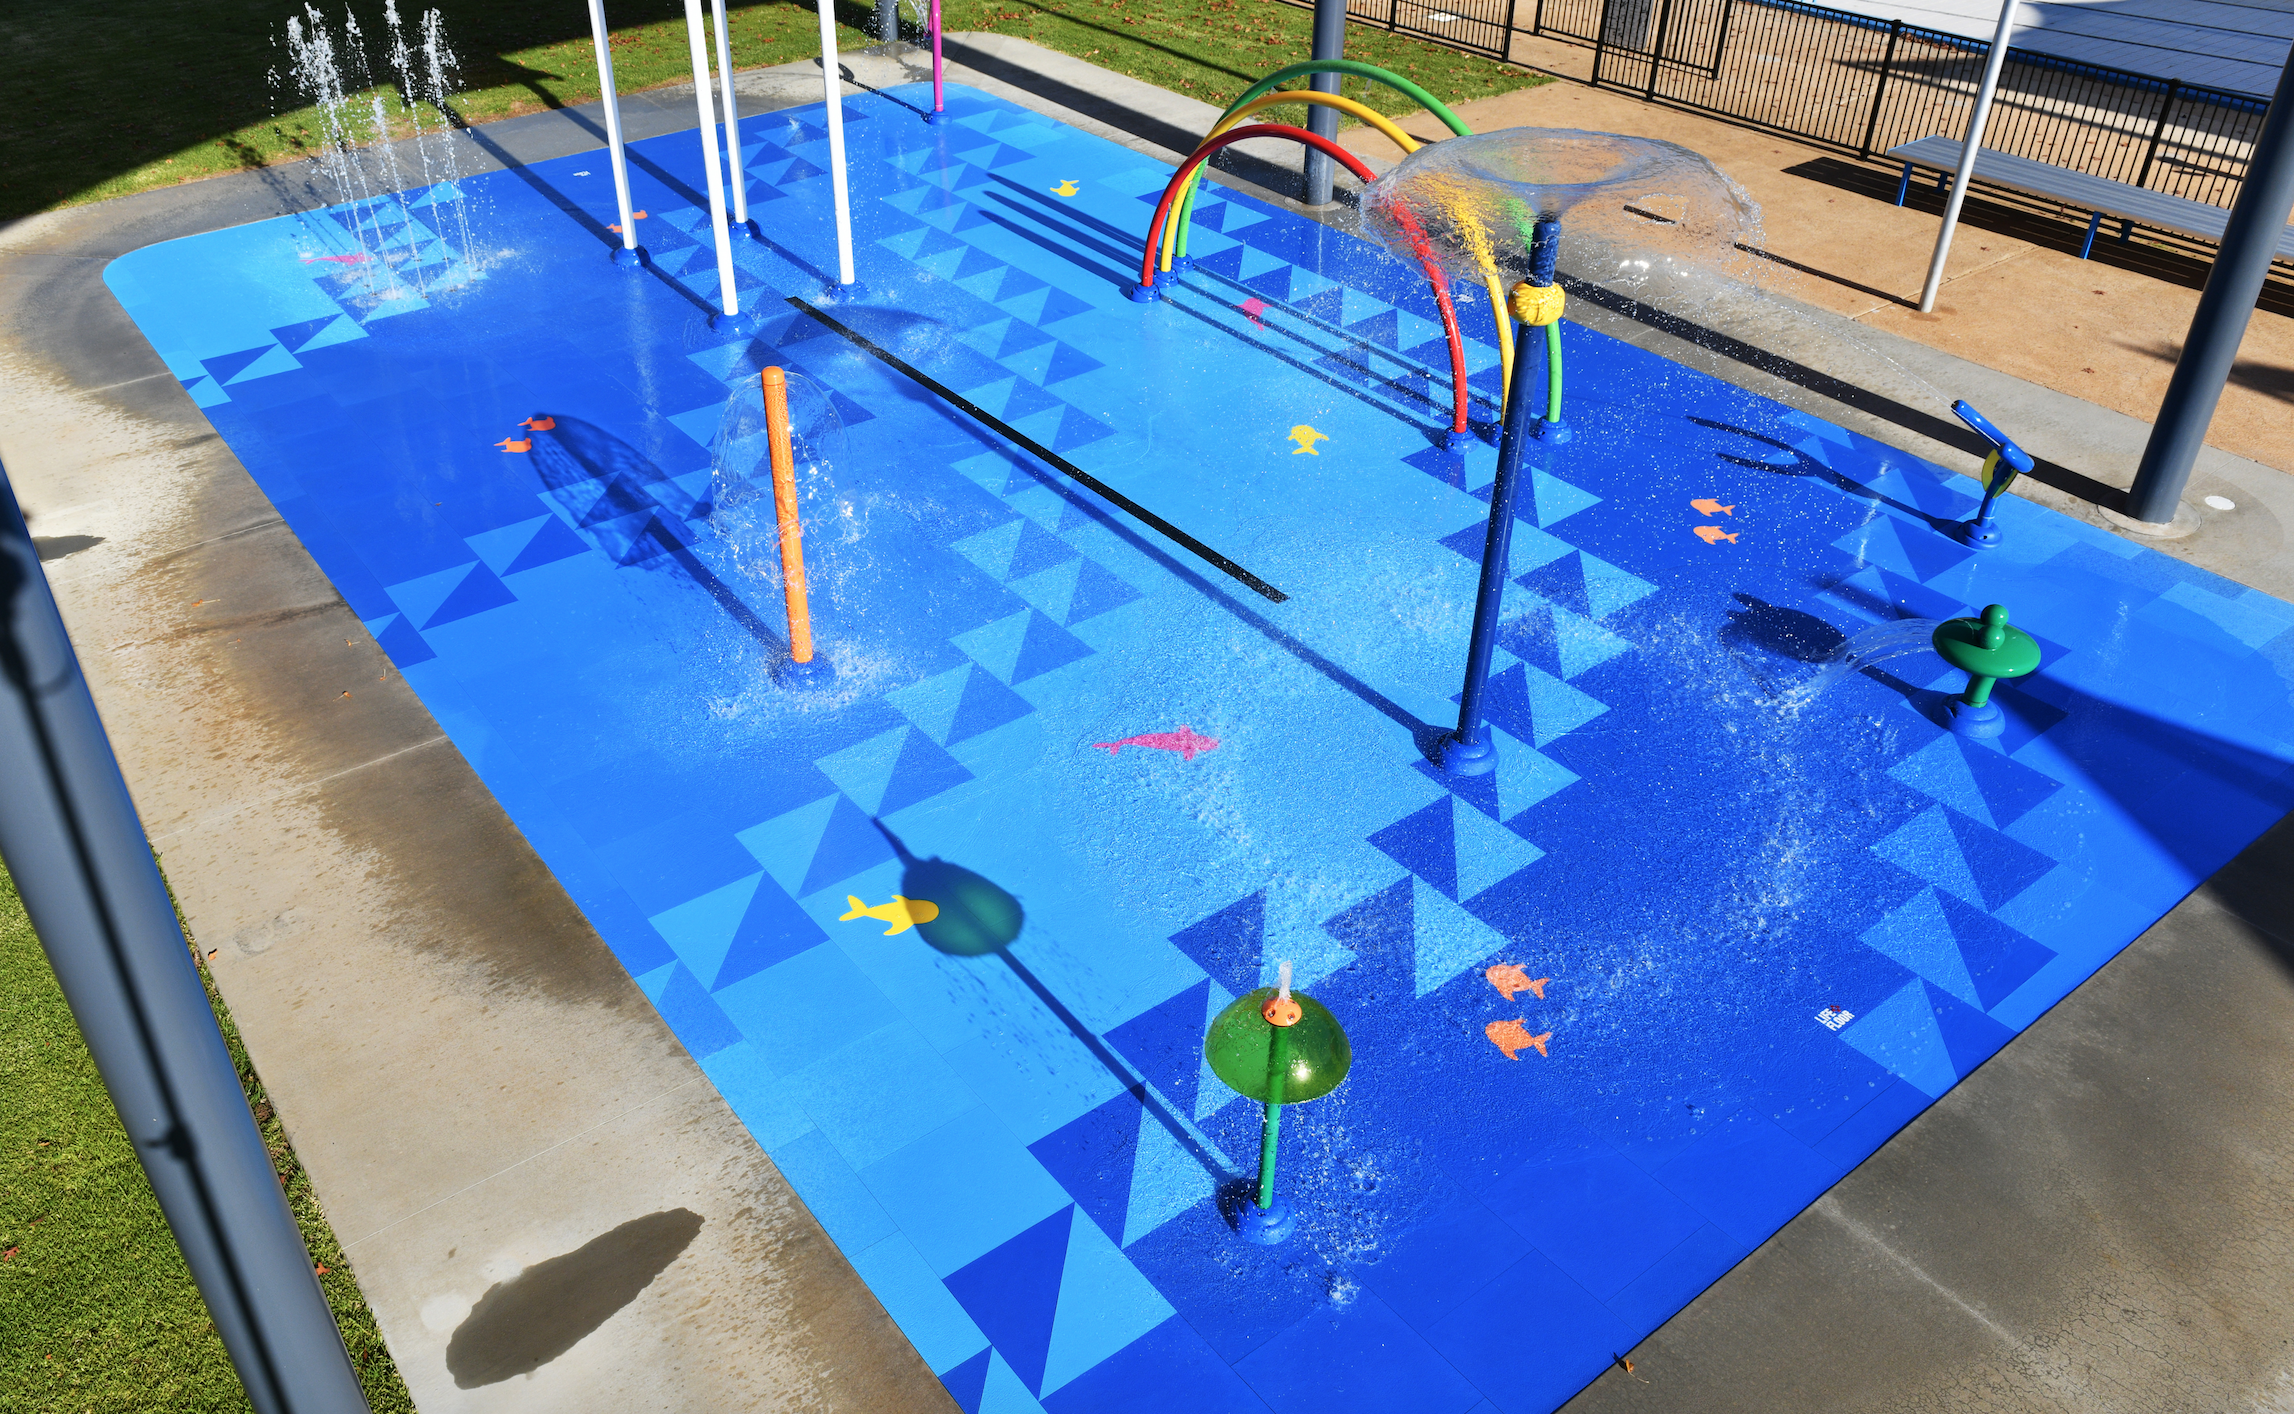
Are you looking to add some sea creatures to your splash pad design? No problem! We have several pre-designed thematic inlays, like fish and crabs, that fit within single square tiles. We can also cut larger creatures, whales or dolphins for instance, across several tiles. 

Want to add a game into the surface? We can custom cut nearly anything into Life Floor. Some popular choices have included hopscotch and checkerboards.

For branding opportunities or to include a facility’s logo within a design, we can precision cut all of the parts in advance at our factory. They arrive ready to install to ensure brand accuracy and a smooth installation process on site. A great example of a large-scale logo we’ve created recently was one that we produced for the Fun Spot splash pad in Orlando, FL. The finished product and a diagram showing all of the precut parts are pictured above. 


Take Advantage of Our Online Resources

Did you know that there are helpful resources on the Design Studio page of our website related to creating designs with Life Floor tiles?

For design inspiration, our Portfolio and past Lookbooks are great places to start!

One of the most popular resources we have posted is a chart that shows color equivalents for all of our tile colors. If you design in Adobe Illustrator (like we do), the Hex codes are very helpful to get the colors in your layouts as accurate as possible. 

Our pre-established color palettes and tile patterns have been popular options for our customers. Head to the Themes and Patterns pages to explore these designs. We even have downloadable templates that can be used in Adobe Illustrator for anyone looking to cut and paste these options into their projects. Use one of these as designed or vary it slightly to cater it to your project!

To get started with a scaled tile grid to represent Life Floor in AutoCAD, we have templates that include hatches for both Metric and Imperial designs. 

Looking for technical details to better understand how our tiles integrate during installation? Those are available on our Specs + Resources page as well! 


While the tips above cover our major suggestions, these are only some of the best practices we’ve established over the years! Want to learn more or have questions for our Studio Team? Feel free to email us at design@lifefloor.com. We love partnering with designers and take great joy in seeing what other great projects are dreamed up by other companies around the world!

Interested in our upcoming Designing with Life Floor Guide?

Sign up below to receive access in advance of it going live! 

Flooring Design Themes for Aquatic Facilities

When designing with Life Floor, clients are often looking to create or enhance an existing theme at a facility. Since our tiles are specifically engineered for use in aquatic environments, these spaces are often themed around water; however, sometimes new themes are imagined as well! We love the creativity that goes into envisioning these spaces. Check out some of our favorites that have been installed as well as some ideas for themed splash pads that haven’t been built yet! 


Under the Sea 

Our blue tones and sea creature inlays are most often featured in spaces that have an underwater theme. Some spaces are more whimsical with octopus tentacles and others are more abstract using a triangle gradient or randomized squares. Curvy waves are also a popular choice for clients looking to emulate an under the sea look. 


Into the Wild 

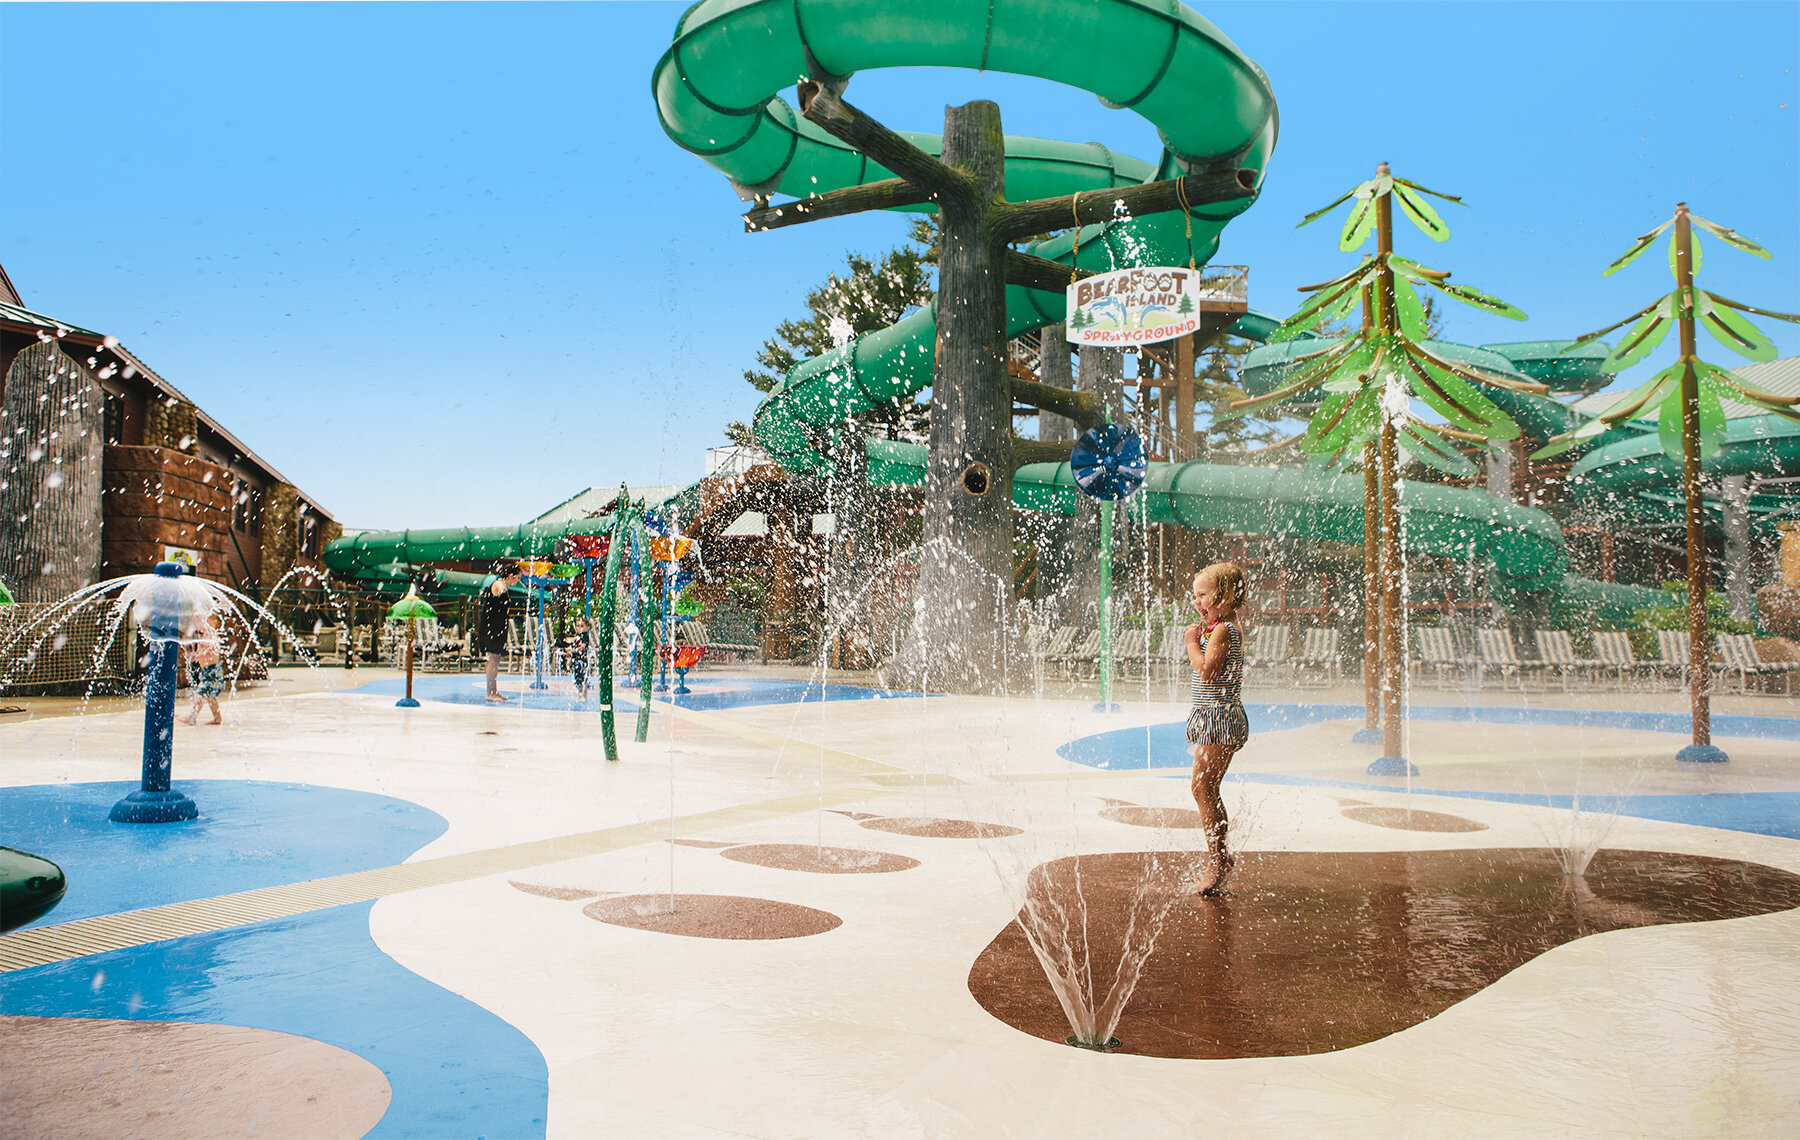
Several facilities with Life Floor installations have a woodsy or wilderness theme. These spaces typically feature earth tones of tans, browns, and greens as well as thematic paw print inlays. The designs that we’ve proposed for these spaces have used a combination of our available shapes including triangles, rectangles, and hexagons.

Wilderness Resort Splash Pad
Concept for a Forest-Themed Splash Pad

Concept for a Forest-Themed Splash Pad

Concept for a Hexagon River Design

Concept for a Hexagon River Design

Lilypad Landing Pad at Great Wolf Lodge

Lilypad Landing Pad at Great Wolf Lodge


Sunny Beachscapes

Adding a beach element to a water-themed splash pad increases visual interest and the opportunity to feature different inlays across the sand and sea. One of our largest beach designs, pictured below at Atlantis the Palm Dubai, features a triangle gradient and a clear progression from land to water and back to land. Other projects with this theme feature a body of water surrounded by sand or, the opposite, an island surrounded by water. Some customers have even opted to add pirate treasure hunt themes to their tropical islands! 

Splash Pad at Atlantis the Palm Dubai
Pirate-Themed Splash Pad at Wyndham Bonnet Creek

Pirate-Themed Splash Pad at Wyndham Bonnet Creek

The Beach Splash Pad in Dubai

The Beach Splash Pad in Dubai


Winter Wonderland 

While these wintery concepts have yet to be installed on a project, we love the idea of a unique frosty theme, especially on a hot summer day! 

Concept for a Winter-Themed Splash Pad

Concept for a Winter-Themed Splash Pad

Concept for a Snowflake Splash Pad

Concept for a Snowflake Splash Pad


Lily Pads 

Some customers have opted for lily pad inspired ideas. These curvy features add visual interest to the splash pads where they’re featured. At a smaller scale, they can inspire children to hop across individual lily pads in a game of leapfrog. 

Florida Aquarium Splash Pad

Florida Aquarium Splash Pad

Lake George RV Park Splash Pad. Image Credit: Martin Aquatic

Lake George RV Park Splash Pad. Image Credit: Martin Aquatic


Bright & Tropical 

Several aquatic facilities have requested vibrant, tropics-inspired themes. Bright pops of color on a surface can dramatically enliven a space and complement surrounding designs and imagery! 

Vidanta Riviera Maya Splash Pad. Photo Credit: WhiteWater West

Vidanta Riviera Maya Splash Pad. Photo Credit: WhiteWater West

Concept for a Bright, Triangle Pattern on a Splash Pad

Concept for a Bright, Triangle Pattern on a Splash Pad

Splashaway Bay at CocoCay. Photo Credit: Royal Caribbean

Splashaway Bay at CocoCay. Photo Credit: Royal Caribbean

Moon Palace Jamaica Splash Pad

Moon Palace Jamaica Splash Pad


Our in-house Studio Team and our design partners loved dreaming up ideas for these designs and themes featured in locations around the world. We welcome all the concepts and ideas our customers want - unique and familiar alike.

What new themes would you like to see featured at aquatic facilities that are surfaced with Life Floor? Let us know in the comments section below!